Ottertail Country

Ottertail Country
Ottertail South

October 26, 2011

The Upper Chimney Caper

.


Here we will show you how to take a chimney off your roof.  Well, assuming you have a fabricated steel chimney that is suspended from the top of an A-frame house....


I know, it looks innocent enough from here....


On an A-frame, all work is done from a ladder laying on the roof.  It's quite stable that way unless there is an entryway or something in line with what you're working on.


So you just loop a rope around something on the roof, tie it to the ladder top and tie the other end to the four wheeler.  That way you can slope the ladder way to the side without it slipping.....


Looks like fun, hey???


Joe Chizek brought his rear-mount loader truck to the house.  We got it as close as we could to the chimney.


Looks like it's going to be close.  Not much boom left here.


Up I go to attach the chains to the loader bucket.


Getting the bucket tied to the chimney with as little slack in the chain as possible.


Starting to lift.......


When it released from the roof, it popped up like apiece of toast out of the toaster!


Clear of the roof.


Off to the west it goes.......


And down towards the truck.


We had inspectors on hand.  Dave and LaVonne happened to stop in just as the chimney was being lowered to the truck.


There it goes.


Here's the hole that was left, right up by the fan.


A couple of shots from the outside.....


Just after getting the plywood fit to cover the hole. 
I know, seems like I'm overdoing it with this post, but I'll tell you, it took alot longer to do it than to tell about it.  I began the project in the fore-noon, and climbed back down off the ladder for the last time at 7:30 in the evening, just as the drizzling rain was starting.  Seems like a long time ago now.....


That's all for now...

I gotta go, Carlo


.

October 11, 2011

Tardy again.... really much.

.


Wow, these items are from late August thru early September!!  I guess this is as far behind as I have ever been.....  I'll try to correct that.
While at a friend's house, I noticed that the email version of the blog is pretty slimmed down compared to what you get here, the actual site.  I noticed no opportunity to comment from there, so just go to the main page to enter your words of wisdom....


Anyway, I found this deluxe 1972 Arctic Cat 340 Panther at a friend's place.  I bought it and gave it to Peggy for her birthday.  Must be reverting to old interests.  I think the last time I owned a snowmobile was probably the same year this one was made....


Hey, Tim was here for a visit (stacking firewood, altering the heating system pipes, cleaning sheds, etc.).  He had borrowed my bike for a while and he came over to help me do some maintenance.


We jacked it up, pulled the handle bars and top fork clamp.  That allowed us access to the top steering column nut so we could adjust the bearing tightness.  I had noticed a clunk now and then when hitting a bump and thought the bearings may be loose.  We got it fixed and now no noise!


The old Ottertail Lodge is looking a little different these days. Pretty spiffy compared to the old look.


I had to kid Dawn about the curtains.... the old ones were camouflage patterns and I told her the new ones looked like boxer shorts.  O.K., I'm not always as suave as I could be.


I told Tim that it looks 'real cute'.


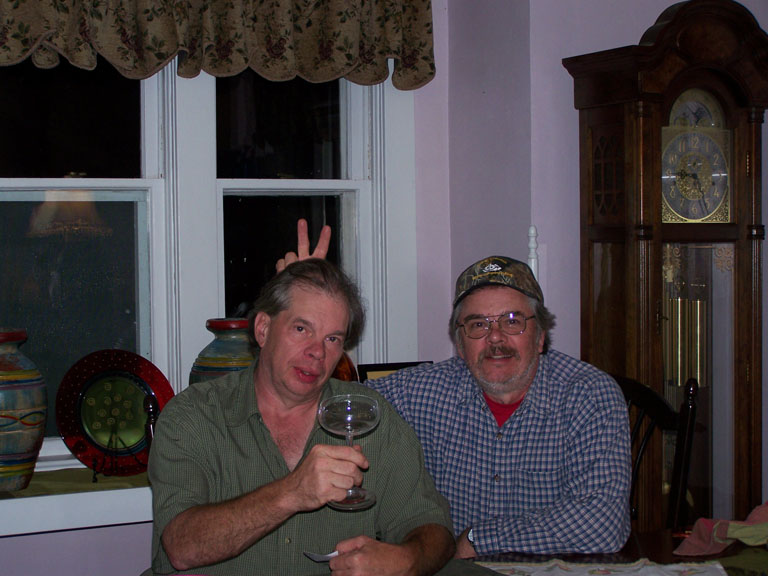
These two certainly seemed happy to be together for the week.


Not sure what Tim is doing here.  Might be the champagne.


And just because I'm old does not mean I'm necessarily mature.


We had a visit from Hailee, and she and Peggy had fun trying out some 're-encting' duds.  She seems to be game for just about any adventure.


Getting ready for the chimney extracting job.  It was pretty cool watching it come out, I'll give you some pix later.


Started in cleaning out the sheds at the south side of the north field.  Lots of interesting stuff, old lumber, whatever.  I saved whatever looked sound and usable, the rest went on the burn pile or to the metal recyclers. 


I have three of the four bays cleaned out.  I got a five yard load of gravel dumped by the sheds and now have two of the three cleaned units graveled.  Makes a good floor, lots of shoveling and raking.


That's about it for now, I'll try to get current with this stuff and I've got lots of photos to post.
Please comment if you have a spare minute or two, it would be good to hear from readers.

I gotta to, Carlo


.

August 22, 2011

More August fun & games......

.

Hey, don't forget to put your email address in the box in the right column.  You'll get a notice of new posts.  And if you have about a minute extra, please think about leaving a comment.  Just click on "comments" at the bottom of the post.


We took out the fireplace.  Here is the aftermath of the lowering a removal of the parts.  Those are some really handy miniature chain hoists that I was able to borrow from work.  They made the task fairly easy.


Fortunately, there were some little steel rings welded to the chimney and we just tied the hoists to those rings.


This is the welded steel base that sat on top of the stonework.  It held the glass fireplace doors and glass panels, and the hood was sitting atop this structure.


This is the heat exchanger that was built into the hood.  It was heavy and we had some difficulty getting it out of the hood.


So here is the base after the removal of all the upper parts. Quite a nice bit of rock work, we were hesitant about taking it out.  But the install of the masonry heater, and the even heat it will provide has overshadowed the doubts.  No more chances of chimney fires, either. 


Before we started the demolition of the base, I hung some plastic sheeting in the shape of a small room surrounding the base.


From the living room.


And from above.  Yes, it had a plastic ceiling....


All this sheeting followed out the front entry way, where a box fan stood blowing out the front door.  This worked really well, as 99% (I'm guessing) went out the door.


The end of the first rough clean-up.


There's that nifty trailer again.  I'm guessing we hauled out about three loads of stone, mortar, iron and tools and supplies.  It works much nicer than a wheelbarrow.


Here's what it looks like right now.  We're hoping to be able to fill in around the new heater in such a way as to be able to preserve all the small, epoxied stone on the floor.


Paul, Candice and kids were up  a while back, before we tore out the fireplace.  We settled on the size and shape of the new heater, and what we wanted the outside of it to look like.  I didn't take many photos while there were here, but I got a few.


Peggy got a custom braiding job, and I must say it turned out quite nice.


Henry climbing on the stairs?  Who would have thought....
We had a great visit and we hope to see them again soon.
Well, that's about it for now, I have more stuff to post, but it will have to wait for a few day.

I gotta go, Carlo......


.